By in

Common Plumbing Mistakes to Avoid

Plumbing issues can be an inconvenience for homeowners. But some projects should be left to professionals. A dripping faucet or slow drain could result in water damage that requires expensive repairs.

DIYers make one of the most common mistakes by failing to turn off their water supply before beginning a project, and over-tightening galvanized pipes may cause them to crack or even break.

Here are some of the most common mistakes to avoid if you plan on fixing or replacing your plumbing in your home or business. 

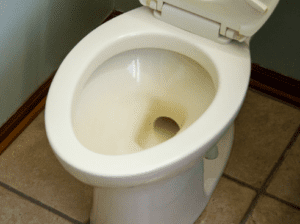
Broken Toilet

1. Not Using the Right Tools

Homemade or improper tools can damage both pipes and fixtures. A bent clothes hanger may seem like an effective solution to unclog a drain, but in reality it could push further clogs deeper into your system. Chemical drain cleaners don’t offer enough strength to unclog most clogs quickly enough and may lead to corrosion damage over time.

DIY plumbers who do their own work often make the mistake of failing to take necessary safety precautions, including wearing protective gloves, goggles and face masks when dealing with chemicals or contaminants. Furthermore, it’s essential that the appropriate tools are being used and be aware of your surroundings at all times in order to avoid injury.

Before beginning work on your plumbing, it’s best to shut off all water sources before beginning repairs. This step is especially essential when working with old or damaged pipes that may burst, while it’s wise to turn off both main water valves to ensure any leaks or bursts stop immediately and don’t cause extensive flooding and damage.

Before purchasing any new pipe materials or fixtures, it’s a wise idea to research their compatibility. Copper and galvanized steel do not mix well and may corrode quickly when exposed. In addition, purchasing suitable connectors and adapters to ensure all of your pipes fit securely together is crucial to their proper installation.

Finally, it’s essential that anything other than waste, toilet paper and human sewage be flushed down your drains. Debris such as grease, fats, oil, coffee grounds egg shells pasta scraps can clog your drains over time causing serious problems down the road.

2. Overtightening the Nuts on the Toilet Bolts

Bolts that connect a toilet tank to its bowl should be tight enough so as to be easily removable, but should not be so tight that removing it becomes impossible. If your toilet leaks from the bottom or wobbles frequently, this may indicate one or more loose bolts that require tightening;

Before doing this however, ensure the water supply has been turned off and empty tank before tightening any bolts; additionally be sure to apply waterproof sealant around its base before tightening them further.

To avoid over tightening toilet bolts, use a wrench to slowly tighten them one quarter turn at a time until all bolts have been tightened evenly – this way you can regularly check to make sure they need further tightening or not.

Furthermore, ensure both sides of each bolt get tightened at an equal pace so as to prevent one side becoming too tight while leaving another too loose.

If you’re having difficulty tightening a loose toilet bolt, try applying penetrating oil and leaving it alone for three to four hours before using pliers to loosen the nut using moderate pressure or tapping on its end with a hammer to release it.

Once your nut is loose, use your wrench to tighten it with care. Be careful not to overtighten as this can crack the porcelain of both tank and bowl as porcelain does not bend under pressure causing it to fracture.

If your toilet still leaks after tightening its bolts, it could be something other than loose bolts that is to blame; perhaps an issue with its rubber seal or flush valve.

In this instance, professional plumbing assistance should be sought to evaluate and resolve it, replacing any problematic components as soon as possible to guarantee leak-free operation of your toilet.

3. Not Using Painter’s Tape to Cover the Toilet Flange Slots

Plumbing issues can range from leaky faucets and toilets that won’t flush to more serious issues like cracked tiles or missing fixtures; most issues can be dealt with without needing professional intervention; however, you should avoid certain mistakes in order to keep your home’s plumbing system operating at peak performance.

One of the most frequently committed DIY plumbing mistakes involves not creating an effective seal between the floor and toilet flange, leading to water seeping under and damaging the floor beneath, potentially leading to rot in its wake. You can avoid this scenario by using high quality caulk such as bathtub or shower caulk to seal bowl-to-flange joints properly.

One common misstep involves failing to affix the flange bolts with PTFE thread tape, which is vital in ensuring they won’t loosen over time. You’ll find it at most hardware stores and it is easy to use; simply make sure that you wrap clockwise instead of counterclockwise when wrapping.

Another plumbing mistake involves failing to install a new toilet wax ring. While this task is easy for most homeowners to complete, its importance cannot be overstated: A wax ring provides a much tighter seal between the toilet and floor and will help protect against leaks or rot that might occur over time.

Last but not least, another common misstep people make is flushing unsuitable materials down their toilets. While this may seem harmless at first, items like cotton swabs, wipes (even those labeled “flushable”) and other materials should always be avoided when flushing down your toilets.

When replacing an older toilet, first shut off the water before unbolting its tank, bowl, lid and water valve from under it. You should then use a small hacksaw to cut off any corroded or spinning bolts in your water closet; when this has been accomplished you can affix new flange and bolts using blue painter’s tape for stability.

4. Not Checking the Angle Stops

An issue like a dripping faucet, running toilet or leaky sink may seem simple for homeowners to resolve without professional help from plumbers; however, homeowners often make costly errors that lead to additional damage or costly repairs for themselves and their homes.

Mistakenly turning off their water supply before performing home plumbing repairs is one of the most dangerous mistakes people can make, potentially leading to severe flooding and property damage in mere moments. Without shutting off water first, pipes could burst and cause considerable damage before you call a professional plumber who can make the necessary repairs.

Another common plumbing mistake involves selecting the wrong kind or size of pipes for any particular task, like when installing new fixtures; using improper size can lead to clogging, as well as indulging in some DIYers who forget how to wrap PTFE thread tape correctly around their pipes, leading to unwinding and leaks down the line.

Homeowners frequently forget to inspect and replace their angle stops on a regular basis, which serve to regulate water flow throughout their homes and help control toilet flushes, sink drains and hot water heater usage. If left neglected, angle stops can become clogged up or broken entirely, leading to major water damage as well as overuse of plumbing systems in your home.

  • Using harsh chemicals to clean drains. This can damage your pipes and create more problems.
  • Pouring grease and oil down the drain. This can clog your pipes and cause backups.
  • Using too much toilet paper. This can also clog your pipes.
  • Not using a plunger properly. This can make the clog worse.
  • Not calling a plumber when you have a problem. This can lead to bigger problems and more expensive repairs.

If you’re not sure how to do something plumbing-related, it’s always best to call a professional. They will have the experience and expertise to do the job right and avoid costly mistakes.

Expert Services at Discount Prices

Our team of experienced professionals will provide you with quality plumbing services at a fraction of the cost. We guarantee our work and make sure you are satisfied with the results. So if you’re looking for a reliable plumber in Minneapolis or the surrounding metro-areas, look no further than Discount Plumbers!

Call the number below or Contact Us Here via our webform. We look forward to servicing you today.

By in

How to Properly Maintain Your Garbage Disposal

How to Properly Maintain Your Garbage Disposal

Your garbage disposal can do an immense amount for you, but proper care must be taken in its use and maintenance. Avoid placing food scraps that could damage or clog the appliance or pipes – such as banana skins, corn husks and eggshells – into it as these could damage it or create blockages in its operation.

Cleaning the rubber splash guard (which typically has gunk-covered underside) with dish soap should help to eliminate grease buildup. Avoid commercial garbage disposal cleaners like bleach as these could potentially harm blades.

Clean the Splash Guard

Though garbage disposals are invaluable appliances in keeping kitchen waste out of landfills, they can get dirty under the sink over time. Particularly its splash guard and drain pipe can quickly become breeding grounds for bacteria; luckily they’re relatively straightforward to keep clean if done regularly.

First, ensure your disposal unit is completely off, either via its main panel or unplugging from an electrical outlet.

Next, use a toothbrush to scrub both rubber flanges on your splash guard using hot soapy water as rinse solution.
Cleaning out the drain pipe of your garbage disposal is also an ideal opportunity to prevent unpleasant odors from building up in it.

To do so, switch off power to it before pouring half a cup of baking soda followed by one full cup of vinegar down its drain – this fizzy combination will break down food scraps while eliminating unpleasant scents.

If you want to give your garbage disposal a fresh scent, try grinding up some citrus peels. Citrus helps neutralize odors while the peels provide additional scrubbing capabilities.

Make sure to regularly inspect the neck of the disposal unit for food particles that might have become lodged and decayed, particularly fibrous foods like celery stalks, corn husks and onion skins that could wrap themselves around blades causing serious complications.

For maximum effectiveness when dropping large items down the drain. always cut large food into small pieces before dropping down.
If even regular cleaning and monitoring don’t keep your garbage disposal smelling fresh and running smoothly, professional help from Discount Plumbers might be necessary. Our team can assist with various plumbing repair issues like clogged drains or malfunctioning motors.

Simply give us a call – we are more than happy to assist!

Clean the Blades

Garbage disposals perform an essential service by grinding up food scraps into fine particles that travel down to drainpipes for disposal.

Unfortunately, their internal walls and drainpipe can sometimes become coated with sticky slime that causes foul odors, clogs, or other problems – this buildup doesn’t take long or effort to eliminate. Simply follow these three easy steps!

Before beginning any maintenance or repairs on a garbage disposal, ensure it has been unplugged and turned off before beginning any cleaning or repair tasks.

To protect against accidental motor or component damage during repair work, referring to the owner’s manual is key in order to understand which tasks can safely be carried out by an end user.

Users should exercise care when placing items into their garbage disposal. Avoid starchy foods like potato peels and rice as well as stringy or fibrous items like corn husks and banana peels which could clog up drainpipes, coffee grounds and fat.

Citrus peels, however, can actually help clean and freshen their disposal by sharpening blades and killing any bacteria which cause foul odors.

Following every use, it is best to run cold water through your disposal unit in order to protect its blades and flush away any food particles that may have become lodged in it or along the sides of its drainpipe. A few ice cubes may also help sharpen and clean its blades while helping eliminate bad smells from it.

Once or twice annually it’s wise to perform a more in-depth cleaning of the garbage disposal by disassembling its splash guard and running a mixture of baking soda and vinegar through its drain opening into the disposal. The acidity from vinegar will break down food debris that remains, while baking soda will scrub walls and drainpipe inside while killing off odor-causing bacteria.

This simple procedure is far more effective than harsh chemical cleaners which could clog drainpipes or destroy key parts of the unit.

Clean the Drain Pipe

Your disposal’s drain pipe can become an easily-clogged zone. Without the appropriate tools or knowledge, attempting to unclog this drain may prove futile; to begin unplugging it and using a flashlight to detect what may be stuck down there is crucial. Remember, disposing of hazardous materials without taking proper precautions is highly dangerous and could cause irreparable damage to both yourself and the machine itself.

To prevent future issues, it’s a smart idea to regularly flush your pipe with natural cleaners like baking soda and vinegar. Such natural cleaners offer similar unclogging power as harsh chemical drain cleaners while being gentler on plastic components – although prolonged chemical drain cleaner use could actually degrade them over time.

After clearing the clog is out of the way, it is recommended to flush your sink and disposal with cold water to help prevent fat from condensing into blades and interior of your disposal. Furthermore, running cold water after each use of your disposal will keep it lubricated and free from food residue build-up.

Maintain a cleaner disposal by adding regular ice cubes. This will keep the unit cool and reduce odors. In addition, periodically using generic or specialty degreasers on your disposal is also beneficial; these will prevent too much grease buildup that prevents proper functioning of the unit.

Whenever your garbage disposal starts smelling offensive, that is a sure sign it needs cleaning. Following these steps should eliminate any foul odors and keep it running smoothly for years. If you find that other methods don’t seem to work or you have a particularly stubborn clog that won’t shift after using these solutions, consulting with a professional may save both money and headaches by calling one out instead.

A quick phone call could save a lot of money and time in repairs.

Don’t Use Drain Cleaners

A garbage disposal can be invaluable when it comes to disposing of food scraps and reducing trash production. But when not maintained correctly, its under-sink workhorse can become an annoyance that leads to smelly drains clogging up quickly – leading to repairs or replacement costs if the unit needs repair or replacement in the near future.

Liquid fats, oils and grease are the top causes of garbage disposal clogs. These substances can form a thick waxy substance that prevents waste flow into the drain pipe from the disposal. Coffee grounds also pose a threat when rinsed down the drain; inorganic materials like paper and plastic waste may clog pipes when flushed through.

Fibrous foods that could harm a garbage disposal include celery stalks, corn husks and onion skins; these items can get caught up in the blades and stop working properly. Bones may also damage them while eggshells should never go in this type of machine – these should all be placed in a trash can instead of being sent down the drain.

Use cold water when using the disposal to help flush away food debris and prevent it from getting trapped inside of either it or your drain pipe. Hot water actually does more harm than good when it comes to clogs as its heat causes grease build-up in pipes; using cold water instead allows it to wash away more efficiently.

Be prepared for any potential clogs in your garbage disposal with a plunger at hand, using flashlight to check what may have gotten caught, then positioning the plunger over the drain hole and plunging. Plunging may sometimes unclog it enough so you can remove it manually; if this method doesn’t work, professional assistance from a plumber should be sought immediately.

Conclusion

These DIY tips can help you maintain your garbage disposal if you don’t have any serious issues with it. However, fixing or replacing on can be a daunting task if you’re not skilled or have the proper tools.

That’s where Discount Plumbers comes to the rescue. Our licensed & professionally trained technicians can do it for you. Give us a call today or contact us here via our webform. 

We are located in the Minneapolis/St. Paul however, we service 65 surrounding metro-areas. We have a plumber near you and available every day of the week. We look forward to servicing you soon!

By in

Top 10 Plumbing Tools For DIY Homeowner

Top 10 Plumbing Tools Every DIY Homeowner Should Have

An adequate plumbing toolkit will save you from some major mishaps and help prevent unnecessary professional services bills for minor issues. Begin with an adjustable wrench for tightening and loosening hex-shaped nuts.

Tubing cutters resembling C-clamps make clean and precise cuts in copper pipes, while hacksaws (ranging from $15-25) are essential for cutting through metal pipe and hardware. You should keep extra blades handy, as these may break or dull quickly.

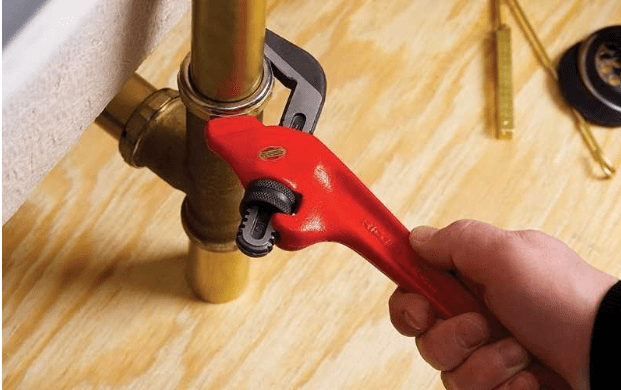
Pipe Wrench

1. Adjustable Wrench

An adjustable wrench is an indispensable tool for loosening and tightening nuts and bolts, hose sockets, and other fasteners that require more force than you alone to operate. A length of pipe over its handle provides increased leverage when working in tight spaces such as under the sink.

Wrenches typically feature serrated jaws designed to grip round objects such as pipes. A variant called a monkey wrench features smooth jaws. Both types of wrenches come in various sizes based on the distance between their handles and jaws, so when selecting one for plumbing tasks it is important to take both size range and durability into consideration.

Some wrenches offer automatic jaw width adjustment which saves you time if you have difficulty turning screws to their correct sizes by hand. This feature may be particularly beneficial to people who find this task more cumbersome.

2. Hacksaw

Hacksaws are handheld tools designed to quickly and efficiently cut through materials such as metal pipes and plastic tubing, making them invaluable tools in plumbing projects.

Hacksaws typically feature an inverted U-shaped frame and handle, typically composed of plastic, wood or metal affixed at its end. Furthermore, adjustable pegs can be tightened to secure blades before being loosed again in order to remove them.

When selecting a hacksaw, choose one with a lightweight frame to minimize fatigue. Slicing metal and PVC pipe can be tiring work, and using an overly-heavy tool will only add further strain. Also look for models with fixed length blades so that the same blade covers all length of frame.

3. Tongue-and-Groove Pliers

Your toolbox would not be complete without pliers! They are indispensable tools, serving multiple functions including gripping pipes and tightening screws, nuts or bolts with precision and force. Plus, their leverage allows for maximum force usage!

Tongue-and-groove pliers, featuring grooves that adjust their jaw widths, are often preferred by mechanics and maintenance techs as they allow them to grip various shapes more securely than standard pliers do. There is a range of sizes available; the ideal ones should have at least 8-inch jaws.

Search for a pair of pliers featuring a V-jaw design made of high-grade alloy steel or vanadium chromium to ensure long-term durability. Make sure they come equipped with coated handles to enhance gripping power and decrease fatigue levels; for optimal results try the CHANNEL LOCK Straight Jaw Tongue-and-Groove Pliers which feature a patented reinforcing edge to minimize stress breakage as well as right angle laser heat-treated teeth to provide firm hold.

4. Metal File

Metal files are invaluable tools that can make a significant impact in several DIY applications and extend the lifespan of other hand tools. Available in numerous sizes, shapes and degrees of coarseness.

Every file serves its own unique function – from smoothing sharp edges and creating flowing curves, removing burrs, cleaning, to shaping materials slowly by chipping away small amounts.

Selecting an appropriate hand file is vital when undertaking any task, especially metalworking projects.

There is an abundance of sizes, teeth patterns and cuts available – for metal working use a half round file with cut of 2 is suitable as it provides versatile coarseness levels across various projects; cross and crossing-cut metal files also exist to handle curves in surfaces.

5. Drain Auger

An auger, more commonly referred to as a plumbing snake or sewer snake, is the perfect tool for clearing away clogged drain pipes. Either manually or electrically operated, these snaking devices can be fed down the drain until they reach their target clog and physically break it apart.

Small household augers typically feature cables two to three inches wide by 25 feet long, equipped with cutter heads to cut through hair or other solid blockages.

Before using a drain auger, loosen the set screw and pull out 6 to 8 inches of cable from its drum. Next, push down and crank your auger into the drain while slowly moving it downward until it reaches whatever is clogging your pipe – then slowly reverse this process if necessary if the blockage persists.

Beware if using a power auger as using too aggressively could damage galvanized zinc coating on older pipes and cause irreparable damage.

6. Pipe Cutter

Pipe cutters are useful plumbing tools designed to safely cut your pipes.

A pipe cutter offers you a much simpler and safer method than using hacksaws or hand saws which may lead to pipe shattering; furthermore it may help avoid unnecessary repairs or replacements down the line.

This ratchet-style cutter has an easy-to-use design that makes getting into hard-to-reach pipes simple. Equipped with a blade capable of cutting PVC, CPVC and PEX pipes as well as an extra blade tucked neatly inside its handle for storage purposes when not in use, this tool makes cutting through these materials quick and painless.

EzyGrind offers minimal vibration and fits easily into deformed pipes, plus its heavy duty construction means it can withstand more stress than generic models like Cobra. Furthermore, its concrete cutting ability makes it an invaluable resource for plumbers.

7. Cartridge Puller

Cartridge faucets use a plastic or metal cartridge with holes corresponding to the faucet stem to control cold and hot water flows. Over time, mineral sediment builds up between its outer wall and that of the brass housing and its inner walls and forms a rigid bond, necessitating replacement cartridge installation; however, doing it yourself or hiring professional plumbers may find this task extremely challenging.

The Cartridge Puller was designed to make this task easy. Comprised of three components – handle, core puller and sleeve puller – this tool helps simplify this task of cartridge removal.

When used to unfreeze frozen cartridges from their housings, handle 10 is turned clockwise which tightens core puller screw 24 into core 38, tightening its knurled grip 66 against sleeve 46 simultaneously while simultaneously breaking apart any rigid sediment between its housing and housings making removal simpler.

8. Nipple Extractor

The Nipple Extractor is designed to free broken pipe nipples without damaging their threads of fittings, thanks to its toothed head gripping broken pieces of pipe and pulling them back out again.

Each set comes complete with multiple extractors for different pipe sizes as well as a ratcheting handle to help turn it. Constructed from durable heat-treated steel that has been zinc plated for corrosion protection; features easy wrench selection through its etched sizes as well as diagonal knurl pattern for enhanced user comfort.

The Internal Nipple Wrench can also be used to unclog PO plugs (lavatory drains with removable rubber pull-out plugs), pop-up assemblies and tub drains. Constructed of high grade metal material with an ergonomic T-loop handle to accommodate hands of any size and style.

Ideal for extracting Nipples from Irrigation Systems with its expandable swivel cam that expands to match internal diameter of Nipples wedged securely in position – perfect!

9. Caulking Gun

Caulking is one of the easiest and most efficient ways to seal leaks and cracks around the house, and caulking guns make the task simple by amplifying pressure applied to tubes of caulk or sealant.

Basic caulking guns require depressing a plunger and pulling a trigger to dispense caulk, but can often be messy and cause discomfort to your index finger (for reduced discomfort use an old latex glove or cut off an existing latex glove).

More advanced models offer features like an auto retracting rod mechanism which ensures no drips occur while providing for more accurate application of caulk.

Opt for a caulking gun that offers extra conveniences, like an integrated spout cutter, ladder hook, and puncture tool. Also look for models with higher thrust ratios to handle thicker materials.

10. Torch

Torches are among the most versatile tools you can have in your toolbox, providing bright illumination of any potentially hazardous areas and situations, so that you can take appropriate actions before accidents occur.

Thanks to LED technology, today’s torches are much brighter and longer beam distance than previous models; Symex torches feature robust brass construction with replaceable nylon buttons which can easily be repaired as necessary.

Conlusion

And there you have it. Having these plumbing tools in your tool box can save you a lot of cash. 

However, if you have a serious plumbing issue that you can’t fix yourself, call Discount Plumbers.

We provide 24 hour/7 day a week service (no extra charge) in Minneapolis/St. Paul and 65 surrounding metro-areas.

You can give us a call at the number in this post or contact us here via our form. We look forward to servicing you today. 

By in ,

How to Install a Sump Pump: A Beginner's Guide to Protect Your Basement

If you live in an area with a high water table or are prone to heavy rainfall, installing a sump pump is an essential step in protecting your home from water damage. A sump pump is a device that helps remove excess water that accumulates in your basement or crawlspace.

Without a sump pump, the water can cause structural damage to your home, create a damp and musty environment, and even promote the growth of mold and mildew.

If you’re a beginner and want to know how to install a sump pump, this guide is for you. In this article, we’ll discuss the different types of sump pumps, the tools and materials you’ll need, and the step-by-step process of installing a sump pump.

What Is A Sump Pump?

A sump pump is a device used to remove water that has accumulated in a sump basin, commonly found in basements or crawl spaces of buildings. It is designed to prevent flooding and water damage by actively pumping out water from the sump pit or basin to a suitable location, such as a storm drain or a well.

The sump pump typically consists of a motorized pump and a float switch. The pump is submerged in the sump pit, and as water accumulates in the pit, the float switch is triggered, activating the pump. The pump then pumps the water out of the pit through a discharge pipe or hose, diverting it away from the building’s foundation.

Types of Sump Pumps

Before we dive into the installation process, let’s first discuss the different types of sump pumps. There are two main types of sump pumps: pedestal and submersible.

Pedestal Sump Pumps

Pedestal sump pumps have a motor mounted on top of a pedestal, which sits outside of the sump pit. These types of sump pumps are typically less expensive and easier to access for maintenance, but they’re also louder and less powerful than submersible sump pumps.

Submersible Sump Pumps

Submersible sump pumps, on the other hand, are completely submerged in the sump pit. These pumps are typically more expensive and harder to access for maintenance, but they’re also quieter and more powerful than pedestal sump pumps.

When choosing between a pedestal and submersible sump pump, consider factors such as your budget, the size of your sump pit, and how often you’ll need to access the pump for maintenance.

Tools and Materials You'll Need

Now that you know the different types of sump pumps, let’s talk about the tools and materials you’ll need to install a sump pump.

Tools

  • Power drill
  • Adjustable wrench
  • Pipe wrench
  • PVC saw
  • Screwdriver
  • Level
  • Safety glasses
  • Gloves
  • Bucket
  • Shovel

Materials

  • Sump pump
  • Check valve
  • PVC pipes and fittings
  • Gravel
  • Sump pit liner
  • Concrete or mortar mix

Now that you have all the necessary tools and materials, let’s walk through the step-by-step process of installing a sump pump.

Step 1: Choose the Location
The first step in installing a sump pump is to choose the location for the sump pit. The sump pit should be located in the lowest point of your basement or crawlspace, where water tends to accumulate.

Step 2: Dig the Sump Pit
Using a shovel, dig a hole for the sump pit. The hole should be deep enough to accommodate the sump pit liner and leave at least 12 inches of space around the liner.

Step 3: Install the Sump Pit Liner
Place the sump pit liner in the hole and make sure it’s level. Surround the liner with gravel to help with drainage.

Step 4: Install the Sump Pump
Place the sump pump in the sump pit and attach the check valve to the pump’s discharge pipe.

Step 5: Install the PVC Pipes
Connect the PVC pipes to the check valve and extend them above ground level. The pipes should be sloped away from the sump pit to ensure proper drainage. Use PVC glue to secure the pipes and fittings together.

Step 6: Seal the Sump Pit
Mix concrete or mortar mix and use it to seal the sump pit around the liner. Make sure the lid of the sump pit fits securely on top.

Step 7: Test the Sump Pump
Fill the sump pit with water and turn on the sump pump. Make sure the water is being pumped out of the pit and away from your home. If everything looks good, congratulations! You have successfully installed a sump pump.

Pedestal Sump Pump
Submersible Sump Pump

FAQs

  1. How often should I check my sump pump?
  • It’s recommended that you check your sump pump at least once a year to ensure it’s functioning properly.
  1. Can I install a sump pump myself?
  • Yes, you can install a sump pump yourself if you have the necessary tools and knowledge. However, if you’re not confident in your abilities, it’s always best to hire a professional.
  1. How long do sump pumps last?
  • The lifespan of a sump pump depends on factors such as usage, quality, and maintenance. On average, a sump pump can last between 5-10 years.

Conclusion

Installing a sump pump is a great way to protect your home from water damage. By following this beginner’s guide, you now have the knowledge and tools necessary to install a sump pump yourself.

Remember to choose the right type of sump pump, gather all necessary tools and materials, and follow the step-by-step process. With a functioning sump pump, you can enjoy a dry and healthy living space.

By in ,

The Ultimate Guide to Sump Pump Installation: Everything You Need to Know

At some point, every homeowner will experience a flood or water damage in their home. Whether it’s from a heavy rainstorm or a burst pipe, water damage can cause extensive and costly repairs. This is where a sump pump comes in. A sump pump is an essential tool that can help prevent water damage and keep your home safe and dry. In this ultimate guide to sump pump installation, we’ll cover everything you need to know to make sure your sump pump is installed correctly and functioning properly.

What is a Sump Pump?

Before we dive into the installation process, let’s first understand what a sump pump is. A sump pump is a small pump that is installed in a pit in your basement or crawl space. The pump’s job is to collect excess water that collects in the pit and pump it out of your home to prevent flooding and water damage. Sump pumps are typically powered by electricity and have a backup battery system in case of power outages.

Types of Sump Pumps

There are two main types of sump pumps: pedestal and submersible. Pedestal sump pumps are installed above the sump pit, while submersible sump pumps are installed inside the pit. Submersible sump pumps are generally considered more efficient and durable than pedestal sump pumps, but they can be more expensive.

Choosing the Right Size Sump Pump

When selecting a sump pump, it’s essential to choose the right size. A sump pump’s size is determined by its horsepower and the gallons per hour (GPH) it can pump. To determine the right size sump pump for your home, consider the size of your basement or crawl space and the amount of water that could potentially enter it. It’s always better to err on the side of caution and choose a sump pump with a higher GPH rating than you think you’ll need.

Installing a Sump Pump

Now that you understand what a sump pump is and how to choose the right size, let’s dive into the installation process. Here’s a step-by-step guide to installing a sump pump:

  1. Locate the sump pit: The first step is to locate the sump pit in your basement or crawl space. The pit is typically a hole in the ground that collects excess water.

  2. Dig the pit: If your home doesn’t have a sump pit, you’ll need to dig one. The pit should be deep enough to accommodate the sump pump and large enough to collect excess water.

  3. Install the sump pump: Place the sump pump in the pit and make sure it is level. Connect the discharge pipe to the pump and run it outside your home.

  4. Install the check valve: Install a check valve on the discharge pipe to prevent water from flowing back into the sump pit.

  5. Connect the backup battery: If your sump pump comes with a backup battery system, connect it to the pump.

  6. Test the sump pump: Fill the sump pit with water and turn on the sump pump to test it. Make sure it is pumping water outside your home and that there are no leaks or issues.

Maintaining Your Sump Pump

Once your sump pump is installed, it’s essential to maintain it regularly to ensure it’s functioning correctly. Here are some tips for maintaining your sump pump:

  • Clean the sump pit regularly to prevent debris from clogging the pump.
  • Test the sump pump every few months to make sure it’s working correctly.
  • Replace the backup battery every two to three years.
  • Consider installing a backup generator in case of power outages.

Contact Us for Expert Sump Pump Installation

If you’re in need of sump pump installation, look no further than Discount Plumbers located in Minneapolis, Minnesota. Our team of experts has the knowledge and expertise to install your sump pump quickly and efficiently, ensuring your home is protected from water damage. If you need repairs, we do that as well.  Contact us today to schedule a consultation and get started.

By in ,

How to Replace a Sump Pump: A Step-by-Step Guide

A sump pump is a crucial component in the basement of a home. It’s responsible for pumping out water that collects in the sump basin and prevents flooding. If your sump pump has failed, you’ll need to replace it as soon as possible. In this article, we’ll provide a step-by-step guide on how to replace a sump pump, including the tools and materials needed, as well as some tips for maintaining your new pump.

Signs that you need to replace your sump pump

Before you replace your sump pump, it’s important to know when it’s time to do so. Here are some signs that your sump pump needs to be replaced:

  • Age: If your sump pump is more than 10 years old, it’s time to replace it.
  • Strange noises: If your sump pump is making strange noises or vibrating excessively, it may be time for a new one.
  • Frequent cycling: If your sump pump is turning on and off frequently, it may be struggling to keep up with the water.
  • Rust or corrosion: If you notice rust or corrosion on your sump pump, it’s likely time for a replacement.
  • No water discharge: If your sump pump is not discharging water, it’s not doing its job and needs to be replaced.

Tools and materials needed

Before you begin, you’ll need the following tools and materials:

  • New sump pump
  • PVC pipe and fittings
  • Screwdriver
  • Adjustable wrench
  • Teflon tape
  • Hose clamps
  • Silicone sealant

1. Turn off power

The first step is to turn off the power to the sump pump. This is important to prevent any accidents while you’re working on the pump. Locate the circuit breaker for the sump pump and turn it off.

2. Remove the old pump

Next, remove the old pump from the sump basin. Use a screwdriver to disconnect the pump from the discharge pipe, and an adjustable wrench to disconnect the check valve. Lift the pump out of the basin.

3. Install the new pump

Now it’s time to install the new pump. Place the new pump in the sump basin and make sure it’s level. Use the manufacturer’s instructions to connect the pump to the discharge pipe and check valve.

4. Connect the discharge pipe

Connect the discharge pipe to the new pump using PVC pipe and fittings. Use Teflon tape on the threaded connections to ensure a tight seal. Use hose clamps to secure the PVC pipe to the pump and check valve.

5. Test the new pump

Once you’ve connected everything, it’s time to test the new pump. Turn on the power to the sump pump and pour water into the sump basin. The pump should turn on and begin pumping water out of the basin. Make sure everything is working properly before you finish.

Tips for maintaining your new sump pump

  • Test your sump pump regularly to make sure it’s working properly.
  • Clean out the sump basin regularly to prevent clogs and debris buildup.
  • Install a backup power source, such as a battery backup, to ensure your sump pump continues to work even during power outages.
  • Consider installing a sump pump alarm to alert you if the water level in the basin becomes too high.
  • Schedule regular maintenance with a professional to ensure your sump pump stays in good working condition.

Conclusion

Replacing a sump pump may seem daunting, but with the right tools and instructions, it’s a relatively simple process. By following the step-by-step guide we’ve provided, you can replace your sump pump and ensure your basement stays dry and flood-free. Remember to also maintain your new pump to keep it functioning properly for years to come.

FAQs

  1. How often should I replace my sump pump?
  • Sump pumps typically last between 5-15 years, so it’s recommended to replace them every 10 years or so.
  1. How do I know if my sump pump needs to be replaced?
  • Signs that your sump pump needs to be replaced include strange noises, frequent cycling, rust or corrosion, and no water discharge.
  1. Can I replace my sump pump myself?
  • Yes, replacing a sump pump is a DIY project, but if you’re not comfortable doing it yourself, it’s best to hire a professional.
  1. What size sump pump do I need?
  • The size of your sump pump depends on the size of your basement and the amount of water it typically collects. A professional can help you determine the right size for your needs.
  1. How do I maintain my sump pump?
  • Regularly test your sump pump, clean out the sump basin, install a backup power source, and schedule regular maintenance with a professional.