By in

What to Do When Your Dishwasher Won't Drain

Dishwasher Not Draining? Do This.

As a homeowner or renter, dealing with a malfunctioning dishwasher can be a frustrating experience. One of the most common issues that people face is a dishwasher that won’t drain properly. Not only can this cause a mess in your kitchen, but it can also lead to unpleasant odors and potentially even damage to your dishwasher.

Fortunately, there are few DIY tips that you can try before calling in a professional. In this blog post, we’ll discuss some of the most effective strategies for fixing a dishwasher that won’t drain, so you can get back to enjoying clean dishes in no time.

NOTE: Before unplugging and opening your dishwasher, lay old towels under it before taking steps to unbolt its lower front panel (many can easily come off). Additionally, check its hose for signs of kinks or blockages.

Check the Drain Hose

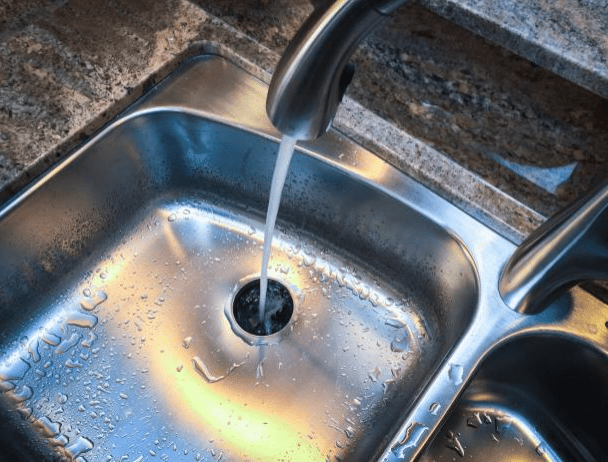
As soon as you open up your dishwasher and find water accumulating inside it, your first reaction may be that this represents a major plumbing emergency. But instead, the issue may be resolved through simple measures.

Most plumbing-related causes for why a dishwasher won’t drain can be traced back to its drain hose, which connects the pump to either the garbage disposal or air gap (more on these shortly) and flushes away dirty water from your machine. 

Make sure this hose is connected correctly without kinks or visible clogs forming; or try blowing through or pushing with something thin like a wire coat hanger to see if clearing out blockages works.

After your dishwasher hose leaves the bottom, it typically passes through a drain solenoid or air gap (described above) before connecting to either your garbage disposal or under sink drain connection. Food debris left in your disposer could potentially clog it, preventing its clean water from reaching the trough and exiting via your hose.

You should check its sump pump screen at the bottom to identify foreign material; alternatively you could test its check valve with a multimeter set to Ohm (O). Replace or repair as necessary.

Check the Drain Tube

As water drains from a dishwasher, it travels through a tube from its source at the bottom of the tub to either your garbage disposal or sink drain – should this tube become pinched, kinked, or blocked, it could stop your machine from draining correctly and may result in flooding issues for you and/or others in the house.

To check this tube, unplug the dishwasher and place rags beneath it so that any excess water doesn’t leak onto your floor. Next, open up your lower front panel by either snapping or screwdriving; if necessary consult your owner’s manual if unsure how.

Now you will have access to the interior of a drain tube, with multiple openings through which water runs. Debris such as broken plastic or stickers, porcelain chips or food scraps may clog this tube; to clean it properly you can use either a wire brush or kitchen pipe cleaner to clear away any obstructions visible in this process.

It’s important to examine the air gap cylinder that’s located inside your drain line hose near where it connects with your disposal or sink drain. An air gap is required in some areas in order to protect drinking water supplies from contamination by sewerage waste. The top of this cylinder has an opening; you can loosen its clamp and place its end into a bucket in order to see if you can cause a clog to clear away.

Check the Garbage Disposal

Your drain hose (or tube) connecting your dishwasher to the garbage disposal may become blocked if food remnants clog it with dirt or grime, as well as age-related changes to its construction that cause it to become clogged or kinked over time.

Before beginning troubleshooting, make sure that you unplug and switch off the disposal and the breaker that serves it – this will prevent an accidental electrocution or electrical fire from taking place. Next, place old towels inside your dishwasher so as to absorb any remaining moisture.

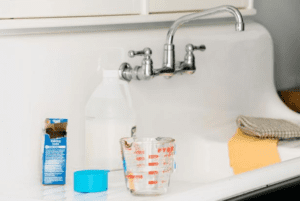
Remove the basket from the bottom of your dishwasher and use a plastic cup to scoop out any smelly, stagnant water that remains. If there’s still excess in the tub, towels or wet/dry shop vac can help absorb it.

Check your garbage disposal drain port to see if there is a small, round plastic plug blocking the hose. If this is the case, remove it and run your dishwasher again; if that still won’t drain then more serious issues with either your garbage disposal or plumbing need to be addressed immediately – most likely by calling in professional plumber. 

Likewise if your drain hose isn’t connected properly (or receiving enough suction power to move food waste through), or isn’t pulling through enough food waste you will require replacement of this piece of pipework.

Check the Controls

At the conclusion of every cycle, some water may remain in the filter area of a dishwasher. Excessive standing water that does not vanish after an entire cycle typically indicates that either your drain hose or sink drain connection has become blocked up; unblocking them should solve your issue.

Disconnect the hoses from both your garbage disposal and sink drain connections and inspect them for signs of clogging or wear and tear. Food debris or garbage debris should be free from build-up in the hose; also, ensure its clamp is securely in place. If one or both connections appear clogged or worn down, consider purchasing new ones immediately.

Drain valves can become blocked with debris. To inspect this in your dishwasher, take steps such as taking away its cover plate near the floor of the machine and looking inside. Pistons and nuts within check valves can become jammed closed with debris accumulation; so be sure they remain clear.

If your dishwasher does not feature a check valve, inspect its upper sump assembly for signs of blockage. This section houses water that flows to the drain pump; press or reset button and observe for three-inch column of water to appear through small center tube when pressing drain button or reset. If not, most likely control board is to blame and will require replacement.

In Conclusion

A dishwasher that won’t drain can be frustrating, but it doesn’t have to mean the end of your appliance’s life. By following the DIY tips outlined in this article, you can troubleshoot and fix many common drainage issues on your own. However, it’s important to remember that some problems may require the help of a professional.

If you’re unsure about any aspect of your repair, don’t hesitate to contact a licensed technician at Discount Plumbers. With proper maintenance and care, your dishwasher can continue to serve you well for years to come.

The importance of having a reliable and trustworthy plumber cannot be overstated. Whether you are dealing with a minor leak or a major plumbing emergency, the team at Discount Plumbers is always ready to provide you with the fast and reliable service you need.

With years of experience and a commitment to customer satisfaction, you can trust us to get the job done right the first time. While we’re located in the Minneapolis/St. Paul area, we provide “plumbers near me services” in 65 surrounding metro-areas

So, if you are looking for a reliable plumber that you can count on, contact Discount Plumbers today. We are always here to help!

Facebook
Twitter
Pinterest

Connect with us!

*$94 drain special applies to owner occupied, single family residential homes only.

By in ,

Common Plumbing Problems Every Homeowner Needs to Watch For

Common Plumbing Problems Every Homeowner Needs to Watch Out For

As a homeowner, plumbing issues may arise that range from clogged drains to water leaks; however, most can be prevented through proper home maintenance practices.

From slow sink draining to signs of leaking pipes behind walls, there are various indicators to watch out for which suggest it may be time to call in a professional plumber.

Plumbing problems can be a nightmare for homeowners. They can cause water damage, increase water bills, and even lead to health problems if left unchecked.

In this article, we will explore some of the most common plumbing problems that homeowners need to watch out for.

Clogged toilets can be an inconvenient reality of life, especially when they occur frequently. A clogged toilet often indicates there is an issue in your plumbing system which needs professional intervention to resolve.

Your household plumbing system consists of PVC or ABS pipes that transport water and waste away from your home. Every time you flush, waste is transported through these pipes into the sewer line and eventually into a municipal or septic tank for disposal. Clogs can form in any part of this system, with toilets themselves often being the cause.

An S-Trap in your toilet serves to catch items that would otherwise go down the drain pipe, including any large objects too big for its pipes and cause tough clogs that require plunging or professional drain cleaning to resolve. Another source of clogs can be young children playing with the toilet to flush toys or objects into it; to prevent these incidents encourage your family members to always use a trashcan instead and not put anything directly down their pipes.

Many items should not be flushed down toilets, including sanitary products, baby wipes, cotton balls and paper towels. As these objects do not dissolve in water they can lead to serious clogs in multiple toilets – as well as broken pipes allowing dirt and debris build-up within their lines resulting in blocked sewer lines.

Clogged drains are one of the most prevalent plumbing problems, leading to backup water that is costly to rectify. Clogs typically result from soap scum, hair and other debris building up over time; however, more serious causes like broken pipes or roots infiltrating sewer lines could also contribute.

If your sinks, bathtubs or showers take an unusually long time to drain, this could be a telltale sign that their drains are clogged. Running hot water down them to melt away any ice deposits. Just be sure that before doing this to shut off the water first!

Gurgling sounds or bubbling water surfacing from your toilet, floor drain, or kitchen sink drain are a telltale sign of clogged drains. When oxygen releases from clogs into pipes it creates bubbles which push waste through.

Be wary of sudden puddles appearing in your yard that could indicate broken sewer lines or root infiltration. Regular drain cleaning will help avoid clogs in your pipes and ensure smooth functioning – you can try homemade remedies like baking soda and vinegar.

This article may interest you: Home Remedies For Clogged Sinks

Pipes are an integral component of your plumbing system, connecting fixtures to the mainline water main. However, pipes don’t stand the test of time, becoming worn and torn over time in older homes in particular. 

You can avoid leaky pipes by being aware of warning signs like water puddles accumulating under fixtures, musty or moldy smells coming from around them and an unexpected increase in your water bill – such as an unexplained increase.

Your pipes are connected by curved joints that can become vulnerable to damage from extreme temperatures, overly high water pressure and corrosion. Most common leaks occur at these joints and are difficult to detect as they’re often hidden behind walls and ceilings – however listening for any clanging or banging noises may help identify its location.

If you suspect a leak, switch off your main valve immediately and contact a plumber as soon as possible. Leaks waste water, cause interior and exterior rotting and staining as well as becoming breeding grounds for bacteria and insects.

Leaks in pipes can be more than an inconvenience or costly repair cost; they can lead to flooding, mold growth and structural damage if left unrepaired. If you notice water puddles accumulating around your property or unexplained increases in your water bill – contact Discount Plumber’s licensed plumber immediately so they can fix the problem for you!

Low Water Pressure

Though many homeowners can try their hand at fixing dripping faucets or clogged drains themselves, low water pressure requires professional assistance. Left unchecked, these issues could escalate into costly plumbing issues that cost money while decreasing efficiency in your home.

If your water pressure drops significantly, the first step should be identifying all locations and fixtures impacted. This will help narrow down the source of the issue faster and lead to finding solutions quicker.

Your pipes can become clogged over time with limescale and minerals that accumulate, restricting water flow. Older galvanized steel pipes are particularly susceptible to becoming blocked over time.

Corrosion of your plumbing lines can also contribute to decreased water pressure. As with blood arteries, corrosion narrows your pipe interiors, restricting water flow. While you may be able to address some areas by clearing away debris, in many cases new sections will need to be installed altogether to restore full functionality of the plumbing system.

One of the primary sources of low water pressure in your home can be an underperforming plumbing system, typically seen through its plumbing. Check your main shut-off valve (typically found near a hose bib) as well as individual fixture shut-off valves to make sure they are fully open and operable.

Dripping Faucet

Dripping faucets can be quite an annoyance. Not only will it disturb your peace and quiet, but their steady drip can quickly rack up your water bill as well as be an ideal breeding ground for bacteria and germs that could potentially harm us – thus prompting immediate attention when the issue becomes evident. It is vital that when an issue of this nature arises it be addressed immediately in order to avoid unnecessary inconvenience and high bills.

This can be caused by many different things, but one common culprit is an “O-ring”, a small rubber ring attached to cartridge type faucet stem screws that wears out over time, leading to leakage around its handle and eventually leading to more serious problems with your faucet itself. Replacing an O-ring can often be quick and simple fix!

An additional source of dripping faucets can be due to a deteriorated valve seat, which sits between the compression mechanism and spout and can become worn over time due to hard water sediment build-up. A plumber should usually be able to easily rectify this situation.

Sometimes this problem can become much larger and require replacing an entire faucet altogether, possibly due to corroded valves, worn-out washers or corrosion in the pipes themselves. Therefore, it is wise to contact a professional plumber as soon as you detect a dripping faucet – this will save both money and stress in the long run!

An endlessly running toilet wastes water and increases utility bills, not to mention being extremely annoying when trying to prepare for work in the morning or sleep at night. This problem often stems from improper connections between flush level and rubber flapper – our experts can quickly identify its source and repair it as soon as possible, saving both time and money!

 Every time you flush, your toilet should run for just a few seconds to refill itself before stopping again. If it keeps running continuously instead of only briefly refilling itself when flushed, this indicates a potential waste of hundreds of gallons each day. A malfunctioning float or fill valve could be responsible for this waste of water; but before calling for repair services there are other areas you can check.

Lift the lid of your toilet tank to reveal an overflow tube made of white plastic, connected to an overflow tube through which is an overflow chain and lever system connected to a rubber flapper.

When initiating flush with your handle, this chain pulls up and opens the flapper for water flow from bowl into tank – while at the same time its float rises and lowers in tank to indicate when bowl is empty or full, indicating when fill valve should open and close.

Over time, rubber flappers can deteriorate and no longer seal correctly, allowing water to leak from the tank into a bowl continuously. Easily remedied with new flappers available at local hardware stores.

This article may interest you: How to Fix a Running Toilet

Hot water heaters are essential home appliances that help everyday tasks run more smoothly – from laundry washing and cooking, to taking an evening shower after a long day at work. As such, homeowners must keep an eye out for signs that their hot water heater may need repair or replacement.

Signs that your water heater may be malfunctioning include not enough hot water for your needs, often caused by mineral deposits forming against its heating elements and leading to reduced pressure and temperature of the water being produced. Another telltale sign could be brownish water due to corrosion or issues with its temperature and pressure relief valve.

If your hot water heater is showing signs of puddling at its base, it may be time to seek professional assistance for repair. Puddling is usually due to slow leaks from its metal tank structure; these could include sediment accumulation, broken steel liner leakage, excessive rust build-up or even an inoperable temperature and pressure relief valve.

More times than not, they are not reparable and need to be replaced. If your water heater is showing signs of not working properly, this article will help you to determine if it’s time to replace it. When to replace a water heater.

Your main waterline connects your home to either public or private water supply systems. This underground line supplies all of your appliances, fixtures and faucets in your home with fresh drinking water. Should it break or leak in an unexpected fashion it could potentially have severe repercussions for all those using its services.

Like everything, water lines have their own natural lifespan and eventually wear away with age and use. Certain lines may also be susceptible to environmental factors like fluctuating temperature or shifting soil conditions that cause more severe damage than expected. Being aware of signs that indicate water line breaks will allow you to get it repaired as soon as possible.

One telltale sign of a broken water line is an unexpected wet spot in your yard, either caused by its leakage or by leaks inside of your house (e.g. the toilet flapper not being secure enough). Water lines often produce strange noises when they’re broken such as rumbling, hissing, or gurgling when their flow stops completely – as well as increasing water bills or decreasing pressure considerably.

In certain instances, replacing an older water line may be preferable to repairing it. If the existing line consists of galvanized metal – potentially subject to lead issues – repairing may not be allowed where you live and 50 year-old pipes should likely be upgraded with modernized materials instead of being repaired.

Home sewer lines are responsible for collecting all wastewater produced within a home and when they become blocked or damaged it can create major headaches for homeowners. Any issues with your main sewer line must be taken seriously to prevent sewage backup or other forms of damage to property and residents alike. Here are some of the more frequently seen issues associated with residential sewer lines.

What Are the Signs of a Sewer Line Problem? One telltale sign of a sewer line problem is slow draining. When multiple drains in your house become regularly blocked up, this is an indicator of an issue with your sewer system. Another red flag would be unusual sounds emanating from the toilet itself such as bubbling or gurgling when not being used; these may indicate possible trouble within its pipes.

Mineral buildup is one of the main causes of clogged sewer lines. Over time, minerals such as calcium and magnesium accumulate in pipes and gradually weaken their integrity – therefore making regular professional maintenance essential to protecting the integrity of your residential plumbing system.

If you need sewer line repair in Minneapolis, don’t hesitate to call our team of experts. We provide two effective options:Cured-in-place pipe lining and trenchless sewer line replacement using special tools called “bursting heads” that simultaneously destroy old lines while simultaneously installing new ones.

Unlike traditional digging methods, this method is minimally-invasive and long-lasting results. Pipe bursting can even help repair more severe forms of damage such as total separation or significant sagging that cannot be fixed with cured-in-place pipe lining alone such as complete separation or significant sagging issues; also see “pipe bursting.”

Signs of water damage in the basement include visible stains on walls, floors and ceilings as well as more subtle indications such as musty smells, mold and mildew growth, flaking paint or peeling walls. If any of these occur in your home it’s imperative that immediate steps be taken – this may save costly structural repairs as well as valuable items stored there from being damaged by moisture damage.

Moisture from outside can seep into a basement through cracks, joints, window wells and porous concrete surfaces, such as cracks. Rain or groundwater that soaks through can cause foundation shifts and flooding; while an insufficient grading plan and poor footing drains could also contribute to water seepage into the foundation.

If you notice white, powdery or glistening substances on your basement walls, it could be efflorescence – a harmless mineral salt that seeps into concrete and then travels through waterways back out again to the surface. While efflorescence poses no health concerns, it’s nevertheless an unsightly symptom of moisture issues in your basement that should be addressed immediately.

An indicator of water penetration into a basement is its floor sinking or gapping; this could be caused by anything from leaky shower, toilet and faucet fixtures to malfunctioning washing machines or dishwashers, cracked or corroded pipes or leaky metal water heaters or storage units rusting with moisture in them – these signs point toward active leaks!

Mildew in the Attic

Most attics don’t have plumbing in them, but some might. Also, any attic that’s behind a wall that’s been affected by an overflowing gutter or clogged downspout could have mold and mildew problems.

Your attic is one of the primary breeding grounds for mold to flourish in your home, often being an area that rarely receives visitors and becoming an undetected source of moisture accumulation. This moisture accumulation can pose health concerns as well as cause material issues in both your attic and throughout the rest of your house – possibly even damage your roof itself!

Most attic mold growth is the result of several contributing factors. Lack of ventilation is one such factor; keeping your attic well ventilated may help lower its risk for mold growth. Moisture accumulation also plays a significant role, as mold thrives off moisture accumulation and quickly spreads throughout an attic if left to its own devices.

Smelling of Mold

A musty smell coming from your attic is an undeniable indicator that there may be mold issues present, often accompanied by black discoloration of wood surfaces in your attic.

Wet Insulation

Wet insulation in your attic is a telltale indicator of mold growth. Once exposed to moisture, its insulation properties deteriorate rapidly, and warm air leaks out through its pores into your home via the attic.

To properly diagnose the type of mold present in your attic, we advise taking a “tape lift sample.” This involves placing a piece of laboratory tape over suspected spots of mold and sending it off for analysis at a laboratory – this will reveal its species name as well as give an idea as to its severity.

Unexplained Wet Spots on the Lawn

As a homeowner, your plumbing system plays an integral part of daily life, from washing dishes and showering to cooking and drinking. Clogged drains or leaky pipes that damage or make your home inhabitable should never be tolerated.

To prevent these problems altogether it is best to have regular plumbing maintenance, repair, replacement services on hand to keep things in working condition – this ensures maximum use from your space!

Any unexplained wet spots on your lawn is often an indicator of an underground plumbing issue. While these wet spots could be due to various reasons, most often it comes down to either a water line leak or sewer line leak causing moisture issues in certain spots of your yard. 

These leaks are easy to diagnose as you simply shut off irrigation system and check area for moisture. If that area still feels damp after doing this then disconnect water meter; if it still reads water flow this indicates an underground plumbing leak that requires professional repairs immediately.

Sewer leaks may be harder to detect, but one sure sign of one would be an unpleasant smell coming from your sewer line. A sewer line leak poses serious health hazards, including creating the perfect breeding grounds for dangerous bacteria. 

If a foul smell persists for more than 24 hours after turning off the water supply, stop all activities immediately and check for signs of leakage in that area. If one exists, call in professionals right away and test it thoroughly to detect whether there’s an active leakage problem.

Expensive Water Bill

An increase in your water consumption may indicate a plumbing problem. Or it could simply be caused by water-intensive activities or new household equipment – like an upgraded pool or sprinkler system using more water than its predecessor did. 

To combat this effect, opt for appliances marked as high efficiency or have the WaterSense logo to reduce their consumption; cover swimming pools when not in use to decrease evaporation and unnecessary usage of precious resources like water.

Leaky toilets and faucets can often lead to high water bills. If this seems likely, shut off all water sources before checking all fixtures for leaky shut-off valves or cartridges that could waste 17 gallons daily; act immediately! A dripping faucet wastes as much water per day.

Your water meter could also be reading higher than usual; in such a situation, it is vital that you contact the local water company so they can conduct a complete meter reading and maintenance check on it.

Summer months tend to bring with them higher water bills due to increased outdoor activity. Many people may be watering gardens, filling swimming pools and/or irrigating lawns – however this should not cause undue concern; simply taking shorter showers or switching to low-flow toilets could significantly cut water consumption and save money in the process.

What to Do in a Plumbing Emergency?

Don’t panic! Plumbing emergencies can happen at any time, and it is essential to know what to do when they occur. Taking the necessary steps to prevent further damage and contacting a professional plumber can save you time, money, and unnecessary stress.

Remember to turn off the water supply, try to locate the source of the problem, and avoid attempting to fix the issue yourself unless you have the proper knowledge and tools. With these tips in mind, you can be prepared for any unexpected plumbing emergency and ensure that your home remains safe and secure.

Conclusion

Don’t hesitate to contact us. Our team of experienced and licensed plumbers is always ready to provide you with top-notch services that meet your needs and exceed your expectations. Whether you need a simple repair or a complex installation, we have the skills and expertise to get the job done right the first time. 

We take pride in our work and strive to ensure that our clients are satisfied with our services. So, if you’re looking for a reliable and trustworthy plumbing company, look no further than Discount Plumbers. We are located in Minneapolis, Minnesota but provide “plumber near me” services in 65 surrounding metro-areas.

We are committed to providing you with the best possible service and ensuring that your plumbing needs are met in a timely and professional manner. Contact us today via our web form or call us at the number below  to schedule an appointment or to learn more about our services.

Facebook
Twitter
Pinterest

Connect with us!

*$94 drain special applies to owner occupied, single family residential homes only.

By in ,

How to Install a New Toilet Properly

How to Install a New Toilet Properly

If your toilet keeps clogging, it may be time to install a new one.
Installing a new toilet is a lot easier than you may think. In fact, many homeowners choose to remove their old toilet and replace it with a new one without the help of a handyman or plumber.

But this shouldn’t be undertaken lightly. If you do decide to make installing a toilet your new DIY project, you should know the basics.

This article will teach you how to properly remove your old toilet and replace it with a brand-new one. You can save quite a bit of money doing it yourself. Let’s get started.

Removing the Old Toilet

First step of preparing to install a new toilet. Uninstalling the old one. To do this, unbolt and loosen mounting nuts on top of the tank with wrench or screwdriver and cut caulk around its base with utility knife before pulling up with wrench/screwdriver. Afterward, place an old rag over hole in floor to prevent sewer gasses from coming up through drainpipe.

Install the closet bolts on a new toilet. If its flange does not meet with the floor, use a bubble level to measure its plumb. If necessary, level it by applying pressure front to back and side to side until its plumb is achieved. 

Next, hand thread the flange bolts through their slots on the ring and tighten by hand tightening their washers by hand. Tighten them by applying pressure front-back and side-side before packing plumber’s putty into its slots so they will hold upright upright. Add new wax rings if required or opt for an easier alternative: Install foam gaskets instead!

Preparing the Floor

Before installing a new toilet, be sure that the floor is prepared. This involves unbolting old flange bolts and cleaning around them as necessary. Use a hammer drill if necessary to bore four evenly spaced holes equidistant (at equal distances) from the flange ring into the concrete subfloor below. Or use a build-up kit to raise it so it reaches level with its counterpart.

Once the area is clean, install the new flange bolts and wax rings, as well as lower your toilet. Check that their holes match up with each reference mark on either side of the flange; use body weight to sink your toilet into its new home on either side of it.

Prime and apply PVC cement to both the flange and drain pipe, then press them together before screwing to the floor. Screw the flange onto the pipe before pushing onto it the flange from above; push into place then screw to floor to keep from shifting during assembly process.

Stuff a rag into drainpipe to block sewer gas and prevent hardware from falling in. Adding steel braided water supply lines is also highly recommended to complete installation process.

Setting the Toilet Bowl

When installing a new toilet, the next step should be setting it in its place. Care should be taken in carefully moving it into place and making sure it’s level before tightening its tank bolts. For best results, have an assistant when moving the tank as toilet porcelain can easily crack if not handled carefully.

Before installing the bowl, ensure it fits the measurements of its predecessor. Position it carefully over the floor flange and rest it securely against closet bolts before plugging any open flanges with towels to prevent sewer gas from escaping. If necessary, add an extender or extra-thick wax ring for better sealing around high off-floor toilet flanges.

Once your toilet is in its proper spot, remove the towel from its flange and tighten its bolts manually by hand alternating tightening to maintain an even pressure distribution and avoid cracking the bowl. When all wing nuts have been tightened securely cover them with plastic caps while adding washers for extra stability of the bowl.

Installing the Toilet Tank

To install the tank, first remove its flange bolt caps using a wrench if possible. Although this task should only be attempted by experienced DIYers, it should still be relatively straightforward and requires only minimal supplies to complete successfully. Make sure you also have some kind of container handy to capture any leakage from connecting your toilet directly to the water line.

Now is a crucial moment to stuff some material like rags into the floor flange to block sewer gasses and odors, thus keeping them out of your home and helping prevent tools from going down into your pipe system.

Now comes the exciting part – installing your new toilet! Use a carpenter’s level to assess and adjust the bowl, before installing washers and nuts to the floor bolts with hand tightening as only hand tightening will avoid cracking the base of your new commode.

For best results, use rubber or plastic washers when tightening bolts since metal ones could crack ceramic bowls during tightening.

Installing the Toilet Seat

Measure the bowl’s dimensions and shape before purchasing a new seat. Some toilet seats come with additional features such as soft-close hinges or easy release buttons for cleaning. If your toilet is an elongated model, for instance, longer bolts and special hinges will be necessary. 

Gather necessary supplies: New toilet seat, screws, screwdriver, wrench.

Remove old seat by unscrewing bolts. Clean the area around the toilet bowl thoroughly. Take the new seat and position it over the holes. Insert screws through the holes and tighten with a screwdriver and wrench. Make sure the seat is level and aligned properly. Test the seat by lifting it up and down.

C
ongratulations, you have successfully installed a toilet seat!

Some homeowners don’t want to be DIYers. It can be messy, hard and frustrating. We get it. Also, toilets are heavy and fragile. There’s nothing worse than breaking it and having to purchase another one. Ugh!

That’s when it’s time to gives us a call. Our plumbers are highly trained and licensed.  Put your mind, and back at ease and let us install it for you. We’re located in the Minneapolis/St. Paul area. However, we currently service 65 of the surrounding metro-areas providing plumbers near me services. We have plumbers in your city right now!

Call the number below or contact us here via our webform. Let’s get started on getting your new toilet installed today.

Facebook
Twitter
Pinterest

Connect with us!

*$94 drain special applies to owner occupied, single family residential homes only.

By in

How to Fix a Running Toilet

How to Fix a Running Toilet

Running toilets waste both water and money, as they cause expensive plumbing damage. Luckily, addressing this issue typically doesn’t necessitate calling in professional help – just follow these simple steps to resolve the problem on your own!

Running toilets can often be traced back to an issue with its flapper; however, other possible culprits include too-long or too-short chains or an out of place float.

In this article, we’ll identify what other issues may be causing problems.

Check the Water Level

An ever-running toilet can waste water and add significantly to utility costs, not to mention cause costly water damage to both its bowl and surrounding area. But fixing this issue shouldn’t be difficult!

While keeping the shut-off valve off, open up the toilet tank lid and observe its water level. If it exceeds the overflow tube, this indicates that your float arm could be set too high. To adjust this lower it by turning the adjustment screw located near the fill valve – this will reduce water levels and stop running toilets altogether.

Repeated attempts may be necessary until your toilet water reaches the ideal setting. Aim to keep its level 1 inch below the overflow tube at all times.

When water enters your overflow tube, this indicates that your flapper or overflow pipe isn’t sealing correctly, perhaps due to a broken flapper, poor fill valve, or chain length issues. In such instances, you must replace both elements; you’ll also need to adjust their length by either adding or subtracting links as necessary in order to stop them tangling around float arm and flapper.

Check the Overflow Tube

Overflow tubes connect a toilet tank to its bowl. If water continues to drain into it despite flushing, it could be because the float setting is too high and needs adjusting by using either the float rod or cup (a horizontal rod extending from the fill valve to a float ball or small cylinder wrapped around the float) or using channel locks to turn its screw counterclockwise and lower its setting.

Modern toilets often use plastic fill valves instead of flappers to seal their tank, with floats moving up and down to seal off its contents, but these valves can break or leak, leading to running toilets. No matter which valve your toilet uses, check it carefully for issues like broken handles, rusty hooks, or signs of wear & tear to avoid running issues in your throne.

An excessively running toilet wastes hundreds of gallons daily and can increase your water bill significantly, so it’s crucial that its source be identified and resolved swiftly. Luckily, these issues are easy to identify and resolve with straightforward solutions that will save money while simultaneously decreasing water consumption.

Check the Fill Valve

One of the main causes of running toilets is an improper functioning fill valve or flapper. If your tank keeps leaking or overflowing, chances are your fill valve or flapper isn’t sealing securely enough and likely needs replacement.

Locate the screw that connects a float rod or cup to the fill valve and use a screwdriver or set of channel locks to turn it counterclockwise for one quarter turn, to lower water levels in your tank. Continue making this adjustment until water stops flowing into your overflow tube.

If your water levels continue to fluctuate, it might be time for a replacement fill valve. Closing off and flushing the toilet will help drain most of the tank’s contents before beginning this task.

Once you have located a replacement part, close off the shut-off valve, disconnect your water supply hose, remove refill tube from overflow tube and put a bucket underneath fill valve to catch any potential spilled water while you install new one.

Remove chain from flapper before beginning; slide off both pegs in tank to disconnect before beginning installation process; once adjusted and filled back into position snap lock ring and refill tube back in.

Check the Flapper

If the water in your tank is running continuously without leaving, but is still not escaping, the issue could lie with the float or flapper not functioning correctly. These two plastic tank components are easy to repair without calling in professional plumber services for installation.

The flapper is a rubber piece that opens during each flush before slowly retracting back down over the flush valve to seal off water flow into the toilet bowl. Over time, this flapper may become stiff or brittle or covered in grime, leading to poor seal performance that allows water to continue entering from its tank into its bowl.

Checking the flapper involves taking two steps. First, unlatching and disconnecting the lift chain connected to the flush handle. Second, lift off and release any pegs from overflow tube and replace as necessary (flappers cost around $10 at hardware stores).

When installing new flappers make sure chain is not too tight as this could prevent it from securing drainpipe hole when dropping onto or closing up drainpipe hole.

An annoying running toilet can waste hundreds of gallons every day and significantly raise your water bill, but most issues with running toilets can be fixed using simple solutions outlined above. From replacing flappers or adjusting floats, to removing and cleaning fill valve assemblies – these steps will help save both money and water without costly plumbing services being required to resolve it.

Discount Plumbers to the Rescue!

If you’ve tried all these fixes but are still having issues, call Discount Plumbers. We’ll be happy to send out one of our licensed, professional plumbers.

While we’re located in the heart of Minneapolis, we provide plumbers near me services in 65 surrounding metro-areas. We are in your city daily. So call the number below or contact us here via our webform. We look forward to servicing you today.

Facebook
Twitter
Pinterest

Connect with us!

*$94 drain special applies to owner occupied, single family residential homes only.

By in ,

Home Remedies For Clogged Sinks

Home Remedies For Clogged Sinks

There’s nothing nastier than standing in a backed up shower as the water level has risen up to your ankles. Yuck! Unfortunately, it happens to a lot of us. Next time you’re a victim of the drain (shower or sink),  you can use household products you probably have on hand to solve the problem in a jiffy.

Some of these remedies are similar and use the same ingredients, just combined differently. However, they provide a safe and effective solution for your clogged drains.

Don’t use harsh store bought chemicals like Drano or Liquid Plumber. These products can do more damage than good. Plus, they are bad for septic tanks and the environment. 

Before trying any of these, be sure to first remove your drain screen or stopper and wipe out any visible blockages with a paper towel.

Boiling Water + Salt

Clogs may be unavoidable, but you can reduce their frequency with some simple preventive steps. From disposing of grease in the garbage to using mesh drain covers – these at-home solutions help ensure clogs don’t develop so you won’t need DIY hacks like boiling water to clear your pipes!

While it may seem counterproductive, pouring salt down your sink may actually help clear a clogged drain. The coarse nature of table salt helps break up gunk and grime that accumulates inside your pipes clog them up, so be careful only using small quantities so as to not over-clog your drains.

Just as boiling water can help prevent future clogs, it can also help flush out an already stubborn one. Simply pour a pot of hot water down your drain and allow it to sit for several minutes, before carefully plunging it out again and repeating this process until your drain is clear.

If your clog persists despite these efforts, professional plumbers or commercial drain cleaners may need to be called in; chemical drain cleaners could potentially corrode pipes further down the road leading to costly repairs down the line if your blockage consisted of hair or grease accumulations.

Baking Soda + Vinegar + Salt + Boiling Water

Baking soda (sodium bicarbonate) is an environmentally-friendly kitchen product with many uses, from clearing out drains to eliminating mineral deposits and eliminating odors.

Furthermore, its slight disinfectant properties help eliminate germs and fungus growth – regular cleaning with baking soda can prevent future clogs.

Clogged kitchen sinks often result from an accumulation of food waste that cannot be properly processed by your garbage disposal system, including fat and grease build-up, stringy foods like celery stalks, starchy materials like pasta and potatoes, and eggshells – any or all of which may clog the drains in your kitchen.

For quick relief from blocked drains in the kitchen, mix together baking soda and salt before pouring it down the drain – this home remedy often works effectively!

After pouring one cup of baking soda down your drain, combine this with one cup of vinegar to produce a chemical reaction which may create foaming but which is actually working to loosen any gunk build-up inside your pipes.

Allow this reaction to run its course for five minutes or until foaming ceases; afterwards use hot water to flush away your drain and pipes.

If your drain clog is more stubborn, combine 1/2 cup baking soda and 1/4 cup salt in a sealed jar, shaking occasionally to evenly disperse these dry ingredients.

Pour this solution down your drain and allow it to sit for several hours (ideally overnight), before heating two cups of boiling water to flush through and flush out your system with this hot liquid.

Make yourself a note or reminder to do this first thing in the morning.

Baking Soda + Vinegar + Lemon + Cream of Tartar + Salt

If your sink drain is clogged with hair, combine baking soda and vinegar for an effective remedy. Doing this creates a chemical reaction that breaks down hair and other organic material before boiling water can flush away all debris from the drain.

Vinegar can be used for many other tasks, including cleaning and polishing wooden furniture, eliminating foul odors in many cases and eliminating stains from fabrics. Additionally, vinegar is frequently combined with other household products to clean drains and sinks effectively.

Adding lemon or cream of tartar to a baking soda and salt solution can increase its ability to combat clogs. This homemade solution for blocked drains that have caused strong odors is among the most effective available. Some prefer the smell of lemon over vinegar.

Pouring 1/2 cup of baking soda followed by one cup of vinegar into your drain can quickly and effectively loosen organic clogs such as hair.
As the mixture breaks down clogs, it should fizz away, which can then be replenished after 30 minutes with some boiling water from a pot.

Boiling Water + Carbinated Soft Drinks

A full pot of hot water can help flush a drain, but may not unclog more deep or stubborn clogs. One popular DIY solution to unclog deep or stubborn clogs involves pouring room temperature 2-liter soft drinks (preferably Coca~Cola) down the drain and waiting two hours before flushing, as these name brand drinks contain carbonated and acidic components which eat through grime and buildup in pipes to clear out debris from drains.

Salt + Borax + Vinegar

Borax is a naturally occurring mineral that is also known as sodium borate. It is commonly used in household cleaning products, such as laundry detergents and multipurpose cleaners.

Borax is also used in the production of glass, ceramics, and enamel. In addition, it has many industrial applications, including as a flame retardant and in the manufacture of fiberglass.

Despite its many uses, borax should be handled with care and kept out of reach of children and pets. It can be irritating to the eyes and skin if not properly used and stored.

Here is a concoction you can use:

  • Pour 1/4 cup salt, followed 1/4 cup Borax down drain.
  • Pour 1/2 cup vinegar down.
  • Finish with a pot of boiling water.
  • Let sit for one hour or until it clears.
  • Run hot tap water to rinse any remaining solution down.
Borax

Last Resort - Toilet Plunger

Toilet plungers may be associated with clearing away clogs from toilets, but they can also be effective in unclogging sink drains. Simply insert the plunger over the clogged drain and pump several times up and down. This motion helps break up any hair or soap scum clinging together so it can pass down through.

In Conclusion

Kitchen sinks often become clogged due to food debris being washed down the drain and into its pipes, often becoming hardened and blocking up these arteries. You could potentially avoid this issue by installing a garbage disposal in your kitchen.

Bathroom sinks can quickly become clogged with hair, soap scum and other debris that clogs their curved drain lines, making it easy for hair strands, toothpaste or other materials to get caught inside them and cause blockages. 

Grease is a notorious drain clogger in many homes. When combined with minerals in your water to form limescale, it can clog drains and pipes causing serious problems for drains and pipes alike. You can prevent this by pouring grease directly into a can or placing scraps directly in the trash instead of pouring it down your sink drain.

Trying some home remedies but the clog has persisted? If that hasn’t helped, calling in a professional plumber might be necessary. A trained expert can assess your clog’s size, type and location before using a suitable drain cleaning method to unclog it. Contact Discount Plumbers to discover more on how they can get your drains flowing again.

We’re located in Minneapolis, Minnesota but provide plumber near me services in 65 surrounding metro-areas. Our licensed, professional plumbers are in these cites daily.  

Don’t hesitate to call the number below or fill our our webform here

Facebook
Twitter
Pinterest

Connect with us!

*$94 drain special applies to owner occupied, single family residential homes only.

By in

Benefits of Installing a Tankless Water Heater

Installing a tankless water heater offers many advantages to any household. They consume less energy, provide higher efficiency, and add value to the home.

They do require electricity for operation and regulation; thus if your area often experiences power outages they may not be the best option for you.

In this post, we’ll cover the benefits of installing one of these systems in your home or business.  

tankless water heater before after
Traditional vs Tankless

Instant Hot Water

These heaters are a great way to upgrade old, rusty models in your home, as well as older models which need repair or are nearing their end of service life. Also referred to as on-demand or instant water heaters, tankless heaters use high powered burners or heating elements instead of storage tanks to heat incoming water instantly and with less of an environmental footprint than their counterparts.

As modern families use multiple showers, washing machines and dishwashers simultaneously in their homes, a traditional tank water heater may struggle to meet demands for instant hot water. This is especially true in older homes where supply lines were not intended for such high consumption rates.

Installing a tankless water heater instead will provide your family with enough instant hot water that they don’t run out or wait around for its reheat cycle to kick back in – without running out at any given point during their daily lives!

Tankless water heaters also offer significant energy cost savings over traditional gas water heaters due to not continually reheating hot water, potentially saving up to 40% in gas costs over its lifespan. Navien tankless water heaters may offer significant cost-cutting potential.

These systems can be powered either by electricity or natural gas/propane. When looking at gas models, look for one with an intermittent pilot light to minimize usage of non-renewable fuel sources and meet local code requirements for emissions and venting. Furthermore, for the best experience consult a professional installer.

Remember, tankless water heaters will incur some upfront costs both for purchase and installation; however, these expenses are offset by reduced energy costs and maintenance needs. Plus, if you opt for gas models, your utility company might even offer rebates or incentives to offset some of this initial investment.

Less Electricity

Tankless systems differ from traditional water heaters in that they only heat water when needed – drastically cutting energy use and power bills in the process.

Some systems can save you up to 20% on electricity costs depending on which model is selected, making the investment worth its while in under two years due to energy savings and potential tax credits.

The heaters feature a smaller footprint than traditional water heaters, enabling you to install one in places previously lacking space for one – including bathrooms and laundry rooms that use plenty of hot water.

Multiple units or hybrid electric and gas tankless heaters may be installed depending on your family size or water usage needs in an effort to meet all their demands.

Gas models tend to be more costly to buy upfront, with their operating costs fluctuating more according to propane or natural gas costs. Electric models require additional wiring infrastructure in your home for support; this adds further cost during installation.

However, over their lifespan a tankless water heater could save up to $2000 in energy costs alone! This investment should definitely be considered before purchasing one.

When installing a tankless water heater, always hire a certified professional plumber as this will ensure the task is carried out according to code. Doing this can protect you against poor workmanship or malfunctioning equipment that could pose safety threats.

Upfront installation costs can quickly increase when upgrading your home’s piping or wiring to accommodate the system. Before signing any contract for installation, consult with a professional plumber to assess current setup. They’ll help determine whether making the change makes financial sense.

Less Maintenance

Tankless or instant hot water systems (also referred to as on-demand or instant hot water systems) do away with the need for storage tanks by heating water instantly. When you open your faucets, using natural gas, propane or electricity sources as necessary – saving energy consumption by 30-50% in comparison with tanks which subsequently saves money and helps the environment!

Technology behind these units is advanced. Water heating elements or high-powered burners heat the water, while a digital controller monitors and controls its temperature as needed. Some models also come equipped with intermittent ignition devices (IID), which reduce the need for pilot lights. In addition, these appliances can connect directly with smart home systems for remote monitoring and control.

Tankless water heaters may cost more upfront, but are an invaluable investment for your home. Not only can they last longer and require fewer repairs compared to their conventional counterparts but their low operating costs often translate to savings over time. Depending on your family needs and lifestyle choices, multiple units may need to be installed so there is always enough hot water.

When moving to a new house or replacing an older unit, selecting the proper size and type of is paramount to efficient living. Consulting with a professional plumber will help determine which option will be most beneficial based on your water consumption patterns and energy costs. They’ll also make sure it fits seamlessly within your plumbing setup and is located optimally for efficiency and convenience.

Before hiring a plumber to for installation, always verify their credentials first. Inquire about their license, BBB affiliation, experience and reputation before getting an accurate cost estimate from them. Whether installing in a new home or replacing an older unit from Discount Plumbers, you can anticipate significant savings and peace of mind from choosing tankless units!

Increased Value

Not only can tankless water heaters save money, they can also bring other benefits to your home beyond financial savings. These benefits may include improved air quality and even easier plumbing maintenance!

Your energy costs will significantly decline with a new system, as traditional ones waste much of the energy they’re given by heating and reheating water that’s not being used; by contrast, tankless units only use energy when necessary and don’t take up much room like traditional models do due to being without tanks that need refilling or taking up additional space.

Your residential electrician can ensure your gas-powered tankless water heater is perfectly tailored to the size and needs of your household, optimizing efficiency while limiting gas use. Furthermore, switching may even qualify you for utility, state and federal rebates!

An installation of one of these systems will add significant value to your home, with swiftly-recouped costs more than made up for by long-term financial benefits. Plus, should you plan on selling soon, an on-demand water heater could make your property more appealing to potential buyers.

They can add as much as 15% to the value of your property, because they’re considered more environmentally-friendly than standard ones and help cut consumption of non-renewable fuel sources, emissions and other pollutants.

Sustainability has never been more crucial for homeowners than it is now, and installing a tankless water heater is an ideal way to show off your commitment while guaranteeing constant hot water access. When upgrading your current unit, contact Discount Plumbers in Minneapolis to have it professionally installed.

Our plumbers near me services include repair, maintenance, replacement and new installations across 65 surrounding metro-areas. Contact us now for more details!

Facebook
Twitter
Pinterest

Connect with us!

*$94 drain special applies to owner occupied, single family residential homes only.